
Table of Contents
- Setting Up WordPress for Your Headless eCommerce Application
- Creating and Setting Up Your eCommerce App for development
- Building Shop Listing Pages With WooGraphQL
- Creating User Login and Navigation
- Creating the Product page and Cart Options
Welcome to the first part of our tutorial series on creating a headless eCommerce application! This series is intended for developers interested in crafting a robust eCommerce application backed by a WooCommerce store utilizing WPGraphQL and WPGraphQL WooCommerce (WooGraphQL). This chapter will walk you through the process of setting up your WordPress installation in preparation for this endeavor.
Setting Up WordPress for Your Headless eCommerce Application
Before we dive in, a few assumptions are in order. We'll presume that you will be following along with our guide and spinning up your WordPress environment exactly as we are by using the Docker configurations found in the /backend directory of the demo repository from GitHub. If you already have a local WordPress installation prepared with the necessary dependencies and plugins, feel free to skip ahead to the section titled Configure WooGraphQL.
What we will be doing
- Clone the
wp-graphql-demorepo - Startup Docker Network
- Install + activate WooCommerce
- Generating products.
- Generating cart page, checkout, and account pages.
- Install + activate WPGraphQL
- Install + activate WPGraphQL WooCommerce
Prerequisites for WP Environment included in demo repository
- PHP
- Composer
- Docker + Docker-Compose
Install Dependencies and Start Docker
To begin, open a terminal to a directory of your choice, and clone the repository and navigate to the /backend directory
git clone https://github.com/kidunot89/woographql-demo.git && cd woographql-demo/backendAfter pulling the repository we should be in the /backend directory. For this tutorial, we won't be using /frontend directory so it can be ignored. Now from the terminal in the /backend directory, run the following command:
composer installAfter the dependencies are installed, use Docker Compose to create and start the Docker network by executing:
docker-compose upOnce Docker has successfully started, you can complete your WordPress installation by navigating to http://localhost:8080/wp/wp-admin.
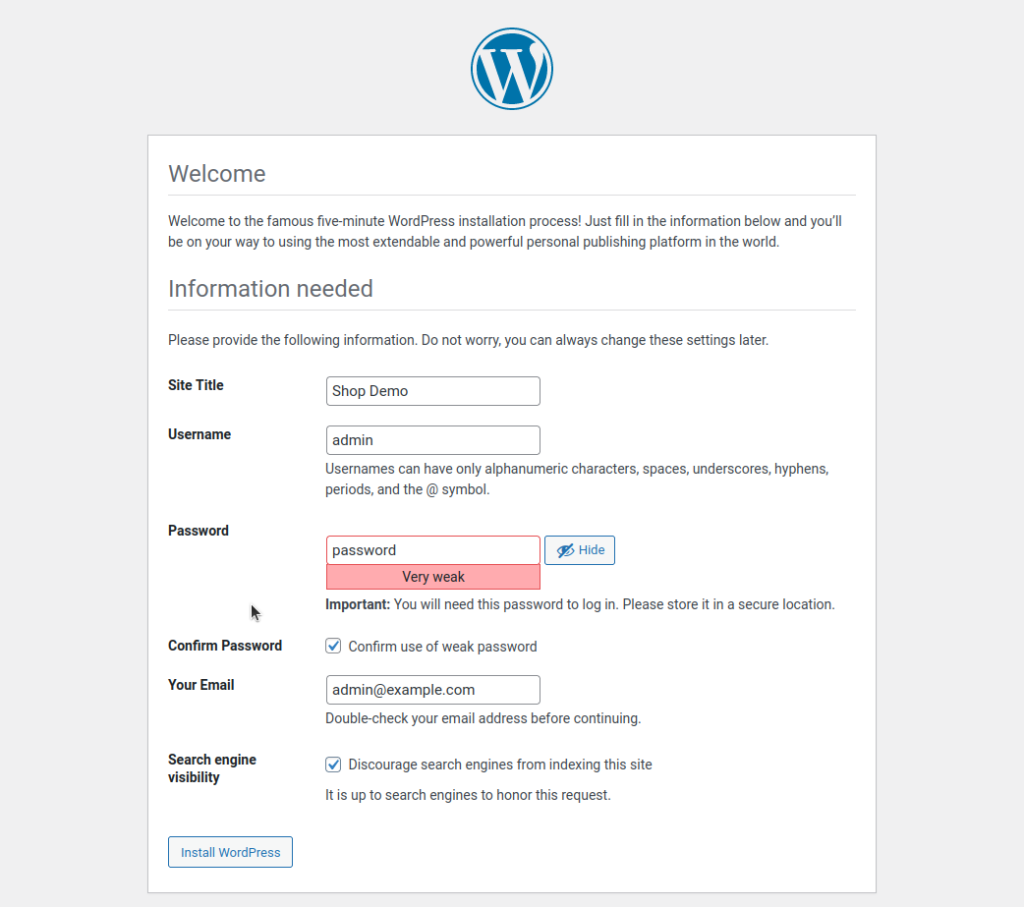
Follow the instructions provided to finalize your installation and log in to your new WordPress site.
Activate Plugins and Setup Store
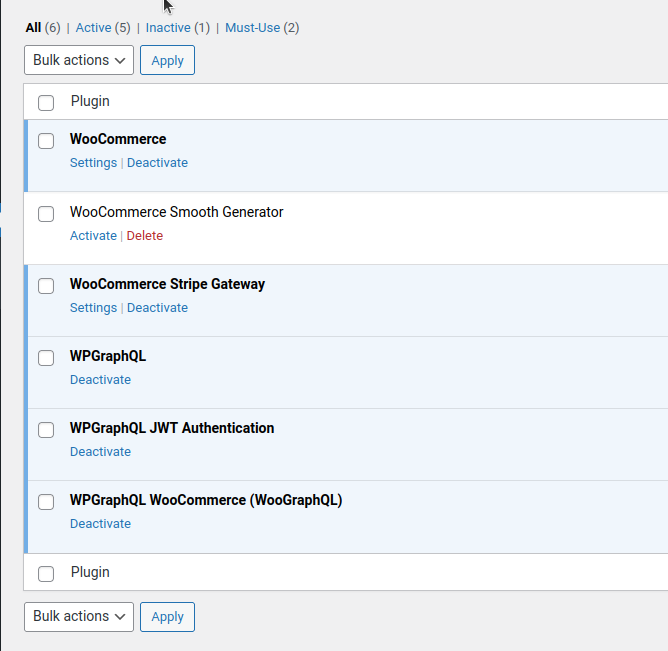
Now that our WordPress site is up and running, let's activate the necessary plugins and set up our store. From your WordPress Dashboard, navigate to the Plugins page and activate the following: WooCommerce, WPGraphQL, and WPGraphQL WooCommerce.
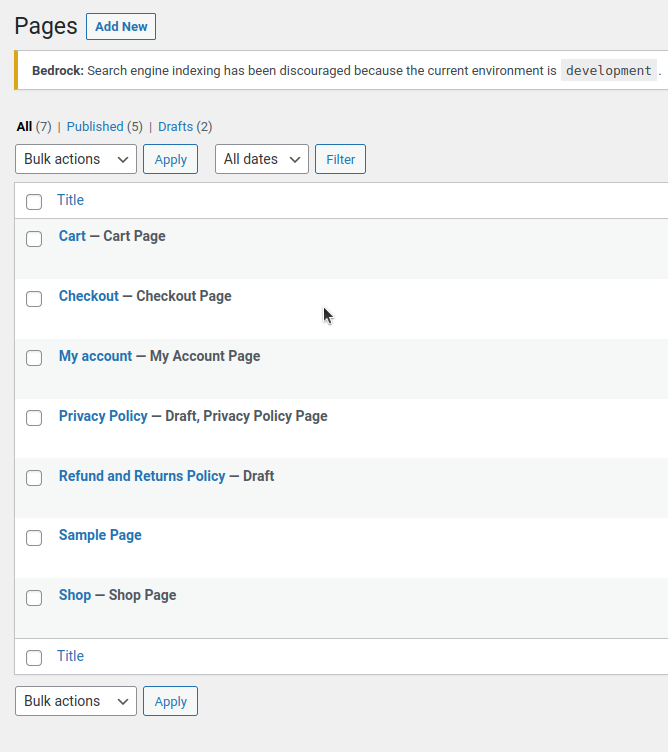
If this is a fresh installation, WooCommerce should auto-generate a Cart, Shop, and Checkout page upon activation.
With your plugins activated, it's time to generate some products for your store. To do this, open a new terminal window (ensuring your Docker network is still running in another terminal window) and navigate to the /backend directory of the demo. From here, run the following command:
composer generate-products 100This command will auto-generate 100 products for your store. While the quality of these products is not top-tier, they're perfect for testing and developing your storefront.

Configure WooGraphQL
Our final step in setting up WordPress for our headless eCommerce application is to configure WooGraphQL. Navigate to the WordPress Dashboard and go to GraphQL > Settings. From here, select the WooGraphQL tab.
Within the WooGraphQL settings, look for the Enable User Session transferring URLs setting and check the Cart URL, Checkout URL, and Account URL options.
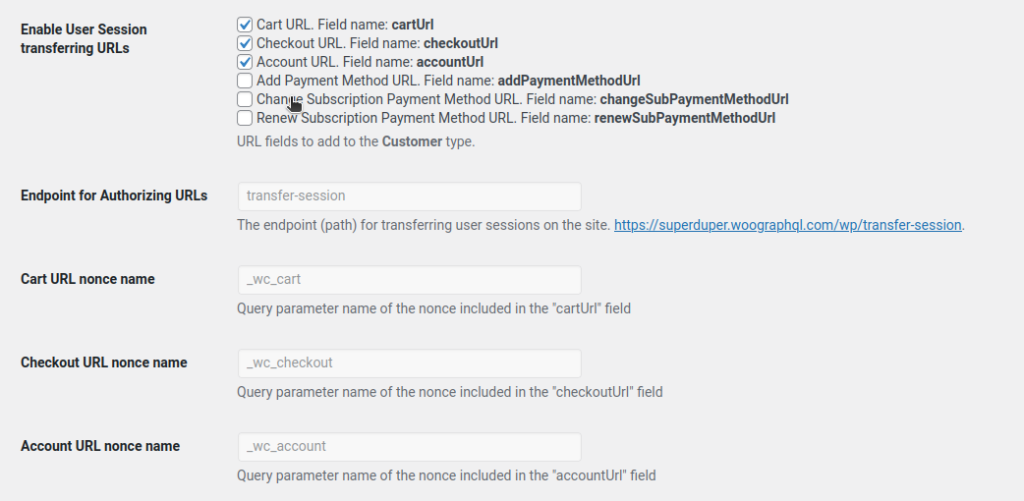
Enabling this option tells WooGraphQL to register the session drop URL we checked to the GraphQL schema, and turns on the session drop endpoint. By default this endpoint is at https://our-site/transfer-session
Don't forget to click the `Save Changes` button to finalize your settings!
And there you have it! Your WordPress installation is now ready for the development of your headless eCommerce application. In the next installment of this tutorial series, we will dive into setting up our front-end with React and Next.js. Happy coding!